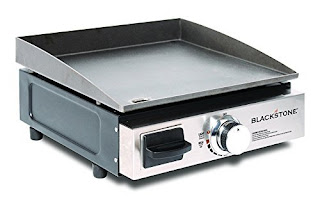
I just got an amazing Blackstone Griddle. It's a great size for cooking for a smaller group and does a fantastic job. It has such a loyal following, it even has its own facebook group! Two, actually, one for owners, and one for recipes.
Here is what it looks like - it's bigger than it appears.
Since we are going to use it as weak travel, I needed a bag for it.
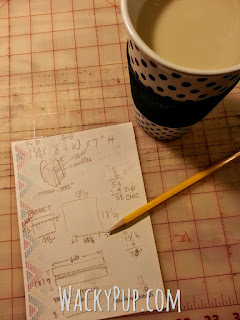
However, I get a huge satisfaction of designing and making things myself, so I'm going to sit down and plan one out. The bag I'm making will work for the Blackstone griddle as well as any similar-sized Grill. You can measure your griddle or grill and make adjustments to my measurements.
Here's what it ended up looking like
This is really a simple project.
Basically, you need two squares for the front/back and a long rectangle for the sides. This is not necessarily the 'best' way, but it is how I do it. If you have any questions, feel free to comment, and I will answer them.
It has a great zippered pocket on the front
It has a rain protected zipper
that goes all the way around so that it is easy to get in and out.
It has 2 D rings so we can put a shoulder strap on it and carry it more easily.
So, here's how I did it:
First, I look through my stash to see what I have to work with.
Here's a great zipper, that apparently came off something red :)
I am going to add a zippered pocket to the front and some D rings so I can attach a shoulder strap.
You will need:
~ 1 yard of heavy Fabric*
60" or longer Zipper
Heavy Duty Thread
104" Sturdy Webbing for Handles*
D Rings (optional)
8" or longer Zipper for Pocket (optional)
* My fabric was 60" wide, more fabric may be needed if it is narrower.
Denier nylon, heavy canvas, denim would all be good choices.
Denier nylon, heavy canvas, denim would all be good choices.
(NOTE: I used a wonderful heavy plastic backed canvas from walmart for $5/yard - but I caution you, if you are not a confident seamster, DON'T TRY THIS FABRIC, IT'S A PAIN TO SEW)
** You can make handles from the fabric that you used to make the carrying case if you want, I chose webbing. This griddle is pretty heavy!
PREPARATION - CUT ALL PIECES
FRONT/BACK
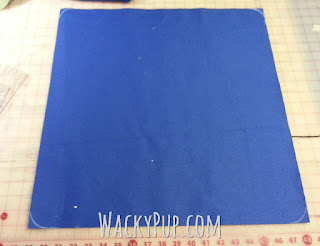
2 pieces 19 1/2" x 19 1/2"
ZIPPER SIDES
1 piece 7 1/2" x 60" or longer
1 piece 6" x 60" or longer
(if your fabric is 60" you can cut these as single strip, otherwise, you will have to piece these)
MINIMUM LENGTH IS 60" it can be longer, but not shorter.
BOTTOM PANEL
1 piece 8"x16"
POCKET
9-10" wide x 10-15" high
add 1 1/2" to height if you want a zipper
depends on how large you want your pocket
Cut the pocket last so you have enough fabric.
You can even make the pocket from different material.
STEP 1 - POCKET
The fabric for the pocket should be about 9-10" wide and can be up to 15" high. Mine is 10" x 10" including the zipper portion
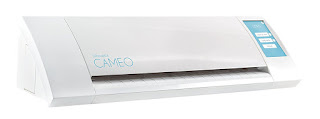
If you are going to embellish the pocket, do it now. I used heat transfer vinyl and my Silhouette Cameo cutter.
You can make it an open pocket by simply hemming the top edge.
To add a pocket, cut the pocket where you want to insert the zipper.
Pin the zipper face down on one edge. Using a zipper foot, sew close to the zipper teeth (but not too close)
Put the other pocket piece face down over the other side of the zipper and sew.
Turn pocket face up and stitch along the folded edge close to the zipper.
Set the pocket aside for now.
STEP 2 - SIDES
If you didn't have enough fabric to make one long piece,
sew your smaller pieces together so you have a piece 7"x 60" or longer,
and one 6" x 60+"
Here's a really easy way to make a 'rain-proof' zipper.sew your smaller pieces together so you have a piece 7"x 60" or longer,
and one 6" x 60+"
Here's what it will look like when you're done

On the 7" wide strip, you're going to sew the zipper just like you did in the pocket.
Pin it all the way, so you can keep it straight. I'm a big believer in pinning!
Sew it, then turn it and stitch along the edge.
Now put the 6" strip on the other side of the zipper, right sides together and sew it all the way. PIN!!
Now it will look like this - DO NOT SEW NEXT TO THE SEAM on this side
Instead, carefully fold the fabric over the zipper. Depending on the width of your zipper - figure out how far you have to fold the fabric to cover the teeth, then mark it, fold it, PIN IT, and stitch along the edge of the zipper.
This is what it looks like after you sew along the edge of the zipper
See - there's the zipper, safely covered by the fold!
Measure your finished zipper side and trim it down to 8" wide x 60+" long (don't make it shorter, just narrower).
STEP 3 - FRONT & BACK & PUTTING IT ALL TOGETHER
Mark the middle of your long zipper side.
Mark the middle of one of your squares
Pin the middle of the side zipper fabric to the middle of the square.
Pin that side. Sew the front side of your carrier with a 1/2" seam
When you get to the corner, you'll have to slit the seam allowance on the zipper side to ease it around the corners.
Carefully continue around the side until you get to the side that will be the bottom of the case. Your zipper should extend about 2" around the final corner. DON'T SEW ALL THE WAY TO THE END - LEAVE ABOUT 2" FREE
It doesn't have to be perfect, or have them end up exactly even, don't sweat it!
After sewing from the center down one side, go back up to the middle of the front, and sew down the other side.
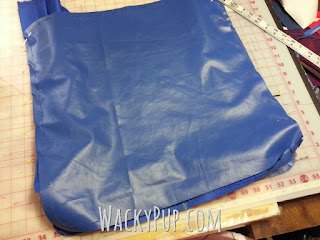
Once you get one square sewn to the zipper side, carefully lay the second square over it. Line it up as carefully as you can and pin it together.
Now you should have the entire bag sewn except for a section on the bottom.
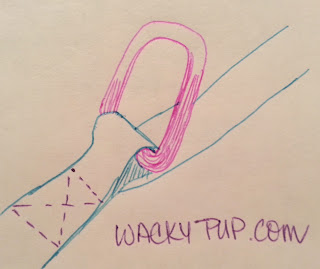
The next step is easy to do and hard to explain.
Take the 8"x16" PANEL piece.
Fold each end of the panel as shown in my wonderful hand-drawn diagram below.
Pin it along the open area of the back
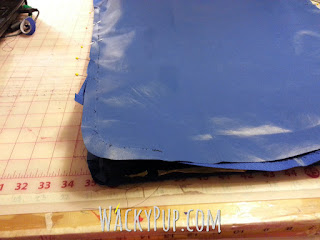
Put the panel BETWEEN the zipper and the square fabric - pin everything out smoothly - then sew the panel and the zipper sides to the front/back pieces.
Turn the case over, and topstitch the fold.

Here's what it looks like now
STEP 4 - STRAP HANDLES
Open the case and lay it down face-up. Mark a line down the center.
Draw a line 4" away from the center line on each side.
Fold under the top and bottom of the pocket.
Center the pocket on the front, pin and sew the top and bottom by topstitching close to the edge. Start and stop about 1/2" from the edge, so it is easier to trim it if it doesn't line up exactly with the straps.
Don't bother sewing the sides of the pocket, they will be caught under the straps.
If you want to add D rings, slide 2 rings onto the webbing before joining ends.
Overlap the ends of the webbing by about 4" and sew securely to make one large loop.
Lay your webbing out and see how you want it to fit.
Put the joined ends at the bottom of the bag.
Slide the D rings up so that there is one at the top of each side.
When you have things how you like, mark them, fold the webbing over the D rings and sew securely
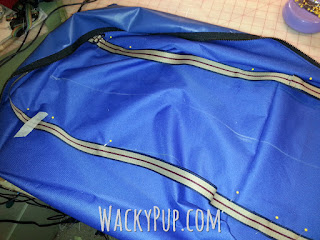
Pin your webbing along the line, leaving 8" between the straps.
Pin the straps over the ends of the pocket.
(If you didn't get it exactly right, trim off any of the pocket that sticks out.)
Sew both sides of the straps down securely.
Stop about 1 1/2"-2" below the top of the bag - put a small square of the heavy fabric inside the bag behind the X stitching to reinforce it.
Reinforce with an X like this:
Here's the finished bag:
And open to put the griddle or grill inside:

It is rewarding to make things yourself but it sure takes time :) Don't feel bad if you buy it instead LOL
Thank you!














It is not my first time to pay a quick visit this web page, i am browsing this web site dailly and
ReplyDeletetake good facts from here everyday.
I plan to make a carry bag for our 22" Blackstone Griddle. Do I just need to increase the top and bottom panels to 24.5"?I
ReplyDeleteI plan to make a carry bag for our 22" Blackstone Griddle. Do I just need to increase the top and bottom panels to 24.5"?
ReplyDeleteDear Likes to Sew:
ReplyDeleteThere seems to be no way to 'reply' to a comment, so hope you get this!
I can't tell you exactly. You'll just have to measure it and add seam allowances.
I hope you are successful, if there is anything that you need clarified, let meknow and I'd be glad to help!
If you use email WackyPupCreations (at) gmail (dog) com I can answer you directly.
Liz
Liz