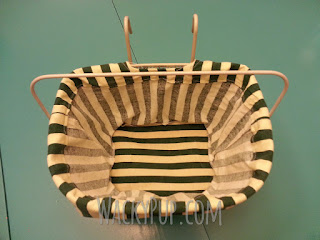
Unfortunately, her little nails get stuck in the basket mesh and she panics, and yelps and makes me swerve. So I thought I should line the basket and make both our lives easier.
My goal was a tailored, lightweight liner with a padded bottom that allows the use of the handle without having to remove the liner.
If you would like to make a REALLY SIMPLE reversible basket liner, leave a comment and tell me and I'll write up a tutorial for it. It's actually easier to make a reversible one. So leave a comment and I'll write up the tutorial for it if you ask!
This liner is a single layer, unlined, with a plain border. You could change it by sewing a ruffle on if you want, but since my husband and I trade baskets we didn't want anything too girly.
Since it is only one layer, the outside of the fabric faces out so that it is visible through the basket. If you have fabric that is the same on the front and back, that would work well for this project. It takes about a yard of fabric.


Some baskets don't have hooks that extend over the handlebars. They are easier to line.
Step 1
Measure the circumference of the top of your basket. Divide this number by 2. Add 1 inch for seam allowances.
Measure the height of your basket - add 8" (you could use a minimum of 6" if you're short of fabric)
Measure the bottom circumference. Divide by 2. Add 1 inch for seam allowances
Cut 2 pieces of fabric
Cut a small notch 1" lower than the height of your basket.
Mark the bottom number on the bottom.
Center this measurement, and cut to taper it up to the notch.
Step 2
Press under 1/2" on the top of both pieces and stitch.
Step 3 for Baskets With Hooks Only
(If your basket doesn't have hooks, skip this step, go to step 4)
Measure the distance that the hooks take up and mark that area on the wrong side of the fabric. Fold down to the notch, mark down to about 1" from the little hem you made & sew, then cut out the extra fabric.
Turn it right side out and topsitch. It will look like this when the liner is finished.
Step 4
Sew 1" down from top of liner, backstitch to make seam secure.
Leave open to the notch, then stitch from the notch down to the bottom.
Step 5
Press the seam open. Stitch the seam allowances down on the area you did not sew. This makes the opening for the basket handles.
Step 6
Fold the flap down to the notch on to the INSIDE and topstitch in place
(this drawing doesn't show the hole for the hooks)
Step 7
Trace the bottom of the basket onto a piece of craft foam. This makes a nice sturdy washable bottom. Cut it down so it fits nicely in the bottom of the basket and test fit it.
Trace around the foam and cut out two pieces of your fabric with a seam allowance. It doesn't matter if it's really even.
Sandwich the foam between the two pieces of foam RIGHT SIDES OUT - You are going to have visible seams when you are done, do not sew it inside out.
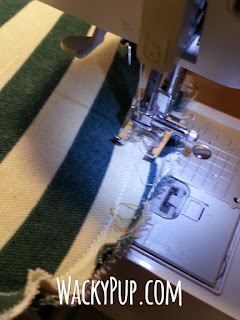
Sew around the edge of the craft foam.
Here is what it looks like after you've sewn it. Leave the seam allowance larger so that it's easier to sew to the sides. Trim after stitching.
Final Assembly
Put the base inside the basket liner. Pin it so the seams are in the middle of the basket bottom sides. This way the opening in the seams will line up with the handles. Sew. You can trim the seam, zig-zag or serge the edge or put bias binding around it. I just serged mine, it won't show under the basket bottom.
 |
| "Mom, you're not really going to make me go out like this are you?" |
You could run a nice wide ribbon through the flange and make a bow on each side if you wanted to make it a little more feminine.
 |
| I want to ride in the basket too!! |


Could you make a bike basket liner like this one but reversible and as a draw string bag?
ReplyDelete