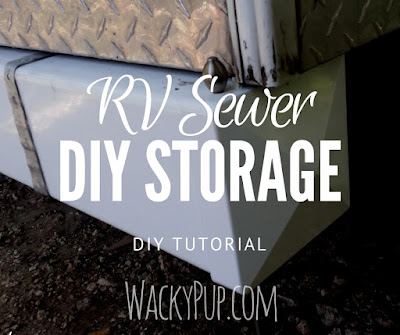
I love my little camper, but it doesn't have a bumper to store the sewer hose in. When you drain the tanks, it's bad enough to deal with the hose, without having to try to shove it into a bucket. I didn't like having it stored in the camper with the rest of our stuff, either. So I was excited to build this storage area for it. This post will show you how I built an RV sewer hose storage from a vinyl fence post that will work even if you have a permanent 90' fitting on the end!
IF YOU STORE YOURS IN YOUR BUMPER: Even when we had a trailer with a bumper, we did not store it in the bumper - the inside is metal, and rusts, and gets rough and will eventually make holes in your sewer line. So even if you have a bumper, this is a better way to store it. After making the holder, just strap it to your bumper.
I used a 5" square vinyl fence post, two fence caps, some metal strapping, screws and a piece of scrap plywood.
You can buy a ready-made, easy to mount storage tube for not much more than it cost me to make mine. But, for me, part of the fun is making it myself :) While looking around online for different storage ideas I found a few, like this one that is about $45, complete with mounting supplies.
or even this one that swings out and makes its own ramp to the sewer connection or the dump station!
The one I made cost about $38 for parts, but it has two storage compartments and I have some strapping & screws left over :) Let me be honest, if you have to buy your parts from Amazon, it's cheaper to buy the whole thing ready-made. There are a lot of variables in the project. I had to order the parts through Home Depot and it took a little over a week to get them. If I wanted to do it quicker, I could have ordered them from Amazon, but it would have cost more. So, it's the basic time/money question. Since my time is worth next to nothing, I chose that one LOL But if you're in a hurry, just buy a ready-made one from Amazon.
Feel free to adapt my idea to suit your own needs. Let me know if it is useful, I love to see what others have done!
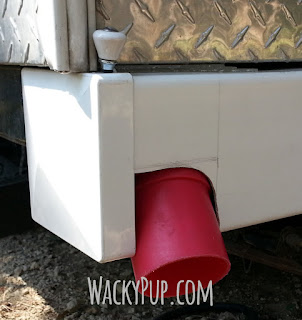
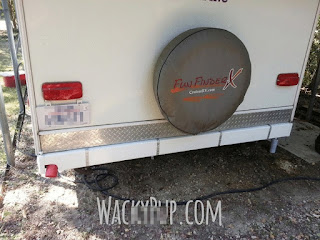
My carrier is open on both ends with a divider in the center. The sewer hose is stored on one end, and the electrical line on the other. Best of all, it frees up a lot of premium storage space in our tiny camper.
a fence post at least as long as your camper is wide,
and
two end caps.
There is a brand called Weatherables at Home Depot and Freedom from Lowes that are made in the USA and are about $30 for an 8' post. I got my vinyl fence post from Home Depot.
a fence post at least as long as your camper is wide,
and
two end caps.
There is a brand called Weatherables at Home Depot and Freedom from Lowes that are made in the USA and are about $30 for an 8' post. I got my vinyl fence post from Home Depot.
My camper is only 7' wide, so I ended up with an extra foot. I cut mine a little too short, it would be better if it stuck out a bit from the ends of the camper. This would make it easier to put the caps on.
Our sewer hose has a permanently attached 90' angle that makes it harder to store.
I drilled holes for drainage on the side of the fence post that would become the bottom of the storage. I drilled them close to the corners so that the hose would not catch on any rough pieces left from drilling.
I marked and cut an area that would allow the 90' angle to hang out.
It is about 2" x 4", but it depends on the shape of the fittings on the hose you're storing.
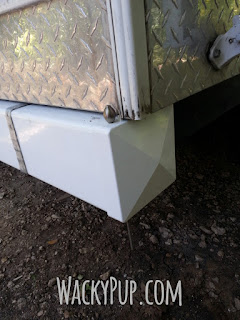
The cap fits over the end, even with the cutout.
I cut a square of plywood that fit snugly into the pipe. I pushed it down to about 2' from the end that will hold the electrical cord. One section will be about 5' for the sewer line, and 2' for the electrical line. I put screws through the sides to hold the wooden divider in place.
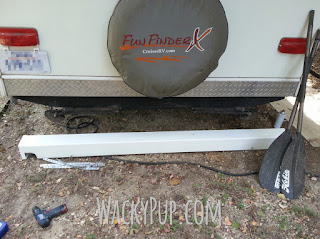
Getting ready to install it.
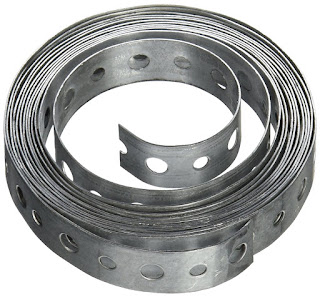
I used metal strapping wrapped around and screwed to the frame with self-tapping screws similar to these. I recommend hex-head because you use a socket and can't strip them. Use your own knowledge or google how to attach something to a trailer or rv frame.
Here's the cute part :) To hold the caps on, I drilled a hole through them while they were on the pipe.
I used two old pop-up levers from bathroom faucets to hold the covers on, one on each end.
The 90' fitting has room for the lid to close.
I used some pieces of an old plastic box as shims in the area between the box and the frame to create enough of a gap to put the cap on and off easily.
On our first trip out it was a great success! Much easier to put the hose away, and room for the electrical cord too! Win-win!











No comments:
Post a Comment
Thank you so much for taking the time to share a comment. If you have a question please use the CONTACT FORM at the top right of the blog to contact me. I can't answer your questions through the comments section. I don't know how to fix this so just use the contact form and I can answer any question you may have. Thanks!