
I have updated the cushions with new fabric, post to come!
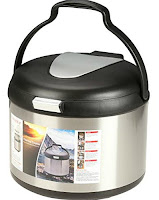
But first I have to tell you about the really neat little thermal pot I just got. Usually, they are over $100, but this one has 4 1/2 stars on Amazon and is only $35! Whooo hoo! Just thought you'd like to know. (If you want to know more about thermal cookers - here's a post)
 It's a 5 Liter Thermal Pot that gets 4 1/2 stars on Amazon and is $35!! (if you appreciate my blog, please buy it through this affiliate link, I will appreciate you.)
Make sure you use that link because Amazon has the same model for $79 under another listing and that is what came up in my search - so if it's not $35, keep looking.
You wouldn't believe how much stuff fits in the boxes and is so easily accessible!
This single box holds
a window fan,
a clip-on fan,
a purifying air filter,
a ceramic heater,
a battery powered light & fan,
and probably a couple other things.
And this is how I did it.
First, let me show you what the inside of my tiny camper looks like -
Really, no floor space, we couldn't even pass each other, one of us had to sit down. I'm not kidding.
Ok, I admit, the change doesn't look like much, but we're talking about 6" folks! Six whole inches in my tiny camper, which is a lot - It's actually 3 square feet more space than I had before. Ok, I know it still doesn't sound like a lot LOL
After the remodel, not only is there more room, but a new storage trolley (green in diagram) that has eight feet of shelves! Plus all the orange area is new empty storage space that was hidden behind the dinette!
First you remove the dinette and build the couch platform - that post is here. When you're done, come back and read the rest here
Part 1: was removing the dinette and building the seat - the details are here - when you get finished reading that, come back and see the rest of the build :)
Part 2: Building the Frame
I cut 2 pieces of plywood, minimum of 1/2" thick, to use for the ends of the couch. The tops are at a height that will be comfortable for an arm rest.
Here you can see the wheel well. I have since insulated it, but unfortunately, didn't think of it while I was building the frame :)
A 1x4 goes around the sides to support the seat. Since the frame of the actual seat is made of 2x4's there doesn't have to be much support other than around the edges.
On the ends, I added uprights to add extra strength to the seat.
There are 3 dividers. They are made of 1"x 2"s They don't have to be very sturdy, because basically all they do is keep the storage bins apart. If you enlarge the photos, you can see how they are put together. I just screwed them to the floor, because my camper is very basic and there's nothing under the floor.
The wood across the top keeps the bin dividers aligned.
I built 4 storage bins from plywood. The fronts, backs and bases are made from 1/2" plywood and the sides are 1/8" plywood. The 1/2" plywood makes it easy to nail the it together, just lap the thin plywood over the edges. To make full use of the space, they are shaped to go over the wheel well in the back.
The fronts are covered with wallpaper and a layer of clear contact paper.
The handles are made from an old belt bolted to the front. To drill the holes in the leather, sandwich it between two pieces of wood and drill it with a regular drill bit. Don't try to drill it without the wood, because it will twist up around the bit.
I used the cushions from the dinette to make the couch. This left an 11" space on the end by the bed. I built a rolling trolley with a removable tray top that slides into that space and has 8 feet of shelf space. The bins are from the dollar tree. They aren't very sturdy, but they're pretty :) I am working on a tutorial for the trolley. Be sure to sign up for emails, or follow me on facebook so that you know when I have the tutorial done.
UPDATE: Trolley Tutorial done! See it here!
Notice the brackets on the front of the couch? They are for the Knock Down Table System I designed. Two snack tables and a dining/game table come apart and store flat. Easy to make from inexpensive materials. I have the full tutorial here.
Remember what it started out like?
Be sure to send me pictures if I've inspired you to do any mods to your camper!


Wow, nice!
ReplyDeleteHi Denise,
ReplyDeleteThanks :) I really liked that couch. We've since gotten a little larger (19') camper and it has the traditional 'trailer' benches that are hard as rocks. I really miss those springs!
Liz