Finally a new post! and a sort-of tutorial! Read on to see how to make an amazingly easy swing up table that:
1 - folds FLAT - no more than 1" thick
2 - takes no special hinges or accessories
3 - can build with what I have on hand
4 - costs nothing
5 - can be mounted on any flat surface that will accept screws.
6 - very sturdy
7 - stylish design
When I removed the dinette and built a couch, I wanted to make a place to put things, okay food, while we sat there.
You can't sit on a couch without food within reach. Even though the kitchen is technically in reach, I wanted a snack table on the arm for hubby to put his snacks :) (complete with cup holder)
I searched the internet thoroughly and did not find anything that fit all my requirements -
1 - folds FLAT - no more than 1" thick
2 - takes no special hinges or accessories
3 - can build with what I have on hand
4 - costs nothing
5 - can be mounted on any flat surface that will accept screws.
6 - very sturdy
7 - stylish design
All I could find on the net were tables that were 2-3" thick when folded, or took special expensive hardware. So I designed it myself, and I'm glad I did - it is exactly what I wanted!
When it is folded down, it only takes up about an inch. It doesn't even stick out from under the arm of the couch. There is a channel in the bottom of the table/shelf that keeps the brace very secure.
here.
When it is set up is is terrifically sturdy - you could sit on it! (but don't)
It even has a cup holder.
I had to cut one corner off the table so we could open the bathroom door.
So, here is how you do it:
You will need 3-4 hinges - just about any hinges will work
Small piece of plywood 1/2"-3/4" thick
Screws
Jig Saw
Table saw or router (optional)
1. Measure the area where you want the table/shelf. My side table is about 14" long and 8" deep. The brace section is about 7" long and 7" deep. (I am not going to walk out to the camper to get the 'real' measurements lol)
You will need at least 7" for a nice stable brace. It is best if the brace goes all the way to the edge of the table, but on a small table, or one that you're not going to put much weight on, a shorter brace would work.
2. Plan how large the table and brace will be.
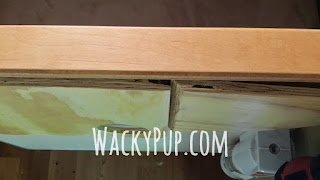
3. Cut your pieces of plywood. The brace needs to have the edge near the shelf beveled so it can swing more than 90 degrees. You can kind of see that in the photo below.
4 Test fit the pieces together and decide where the channel for the brace will be located.
Use a table saw or a router to cut about 1/4" into the wood and carve out a channel for the brace to sit in. If you use a router, it will be neater and won't have to extend all the way to the edge as mine does. I used a table saw :)
If you don't have a table saw or router, you can cut 1/4" plywood or masonite the same shape as your top. Then mark where you want the brace to sit. Remove the masonite from that area. Glue the masonite on the bottom of your shelf and you will have a channel for your brace.
5. Use a hole saw to make a cup holder if you want.
6. Sand and finish to your liking. I think it would be great painted to look like a wing.
7. Mount the shelf/table with two hinges. I recommend you use two hinges on the brace as well, but I only had 3 hinges LOL It's actually working really well, but if I find another hinge, I'll add it.
Now sit down and have a snack on your new snack table!!!


No comments:
Post a Comment
Thank you so much for taking the time to share a comment. If you have a question please use the CONTACT FORM at the top right of the blog to contact me. I can't answer your questions through the comments section. I don't know how to fix this so just use the contact form and I can answer any question you may have. Thanks!