When we bought our first 'beginner' kayaks, they were really neat. They were made by Lifetime and were small, lightweight and best of all, they came with the sails you see in the photo. We have long since moved on to better kayaks, but we use those sails with every kayak we own including a Hobie tandem. Since we lost a sail in a near death experience, I came up with a way to make them myself. Here's how I did it
I think the only place you can still get these sails is directly from the factory - Lifetime Kayak Sails. They are $60 if you buy them separately, but ours came with the kayak. I don't think we would have paid that much for them otherwise, and we would have really missed out on a great addition to our kayaking.
My husband and I love flat-water kayaking. We are not shooting rapids or fighting the surf, we are paddling gently around lakes, ponds and slow-moving creeks watching birds, ducks, beavers, nutria and even an occasional otter. Most of the time we paddle one way and sail back.
We love putting up our sails and drifting along. On a recent camping trip, we managed to lose one of the sails overboard. I made a new one right at the campground using very simple tools. If you have a sewing machine and a drill, you can make a simple sail that will serve you well and save a lot of paddling.
Here's how I did it.
You will need:
10' of Aluminum Conduit
1 Bolt & Nut
1 Bolt & Nut
2 Small Screws
2 PVC Couplings that fit over the end of the Conduit
Nylon String or Cording to hold Sail
Nylon String or Cording to hold Sail
Nylon Rope
Fabric - Lightweight, waterproof is best
1 Metal Pipe Strap
Fabric - Lightweight, waterproof is best
1 Metal Pipe Strap
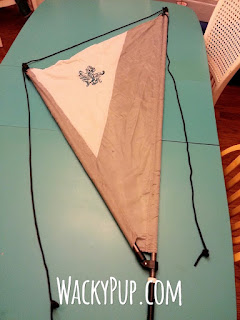
Here is what the original sails look like:
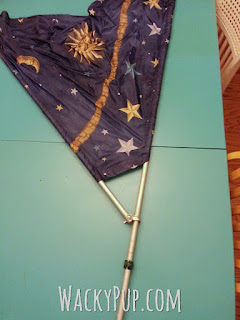
Here is what my homemade sail looks like
It is the same size, but doesn't look like it.
I made it from an old shower curtain. It is a nice heavy fabric.
Here is one I made at a campsite after we lost one of ours in a river. This is a very thin shower curtain, but it still worked fine. You can tell by looking at it that this is not a project that takes finicky measurements. Just about anything you do will work.
Basically, it is a simple V made of pipe with a sliding joint at the bottom. A rope runs up one side, goes through a hole at the top of the pole, runs across to a hole in the top of the other pole and back down. You hold or tie the lines to keep the sail in the position you want, facing the direction you want and as open or closed as you want.
Build the Frame
Cut your 10' pipe into a 4' piece and a 6' piece. The 6' piece is the mast.
Here is what the original plastic joint looks like
Here is the way I rigged it up -
Bend the pipe hanger so that it fits around the conduit, and you can put a bolt through it.
Drill a hole in the 4' piece of conduit, near the end.
Put the pipe hanger around the mast piece, bolt the 4' piece to it.
This allows the pieces to swivel and slide up and down the mast.
Sew The Sail
Cut the shower curtain this way:
The sail is just a triangle like this, stood on one point.
Measure out 58" on each side from one corner of the shower curtain and cut on a diagonal

You will end up with a large triangle like this:
Hem one of the 58" sides. This will be the top of the sail.
Now lay the triangle down with the long side straight up (the mast)
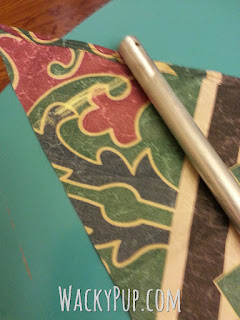
Lay your joined conduit pieces on your fabric and cut your fabric 6" wider than your frame on each side so that it is large enough to wrap around the pipes and have enough to fold under and sew.
Cut the fabric at the top and bottom of the sail with enough extra to turn under, and hem it.
At the top of the conduit, you will need some PVC pieces to hold everything together. You could just drill holes in the conduit, but I think the sharp edges would wear the lines out in very little time. PVC fittings work well for this. Just find a coupling that sort of fits on the conduit. It doesn't have to be really tight because you're going to use a screw to hold it on. If it's really loose, use a bolt & nut.
This is the PVC piece that I found that worked well. It is threaded on one end which makes the interior small enough to mount on the conduit.
Drill a hole in the PVC large enough for your rope to slide through.

Now you need something to keep the sail up on the pipe.
I used a grommet on mine, but you can do it with just a buttonhole.
Put a grommet or a buttonhole near the top of the sail next to the sleeve you made for the conduit.
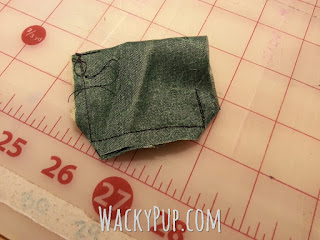
If your fabric is lightweight, it is best to reinforce this with an extra piece of fabric.
To make a reinforcement, sew a rectangle together,
turn right side out
Sew it at the point you need to attach a grommet.
By the way if you need a reliable, sewing machine that makes great buttonholes, I recommend this one - I love it!
The triangle one is made by folding a square in half.
Using scissors, cut a small hole
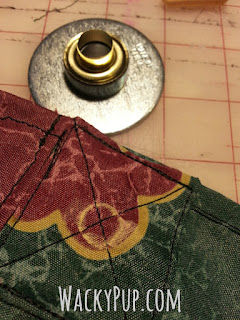
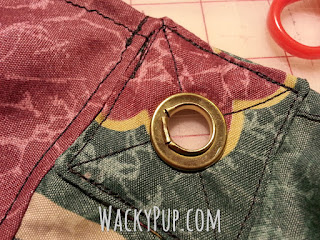
Slip the grommet through, put the washer on, and use the grommet tool to curl it over. Tap gently but firmly with a small hammer. That's all there is to it!
I recommend a small hammer, because if you hit it too hard, you will get one that looks like this:
You want to curl the metal slowly and evenly.
When I did this at a campground with limited tools. I simply made a button hole, reinforced with extra fabric and ran the cord through there.
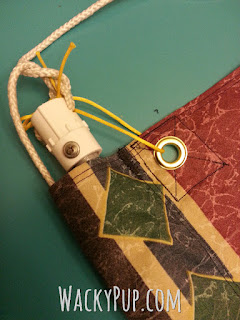
The white rope is the line you will use to control the sail.
The yellow cording is just tied to the sail to keep it on the pole.
You can prop the sail up between your knees, or use a fishing rod or drink holder. In another post, if you ask nicely, I'll show you how to make a mount that will work on just about any sit-in type kayak.
When we use our big Hobie tandem kayak, I just put one sail in each of the front fishing rod holders like this -
This was a test to see if the homemade one performed as well as the purchased one - and it actually did better!

Complete success! Now I need to make a second one so they match again!














Is this sail flat, no draft point etcetera. Will it point upwind more or less?
ReplyDeleteYour way of telling the whole thing in this post is in fact good, every one can effortlessly understand it,
ReplyDeleteThanks a lot.
Hi, can I commission one of these sails? Lifetime seems to have discontinued their sail and I'm not very handy or have any of these tools (sewing machine!) If you could build me one I'd be happy to buy one.
ReplyDelete