The large roll-out awning on the front shades most of our camper. However, there is a window at the head of the bed that seems to get a lot of HOT sun, no matter where we are parked. Or rain, it gets rain, too. I decided that there must be some way to make an awning that would work for protection, but be removable and break down for storage. Oh, and fully adjustable, that would be nice!
These awnings will work with every kind of camper I have seen, flat windows or crank out windows. They will evrn work with t@b / t@g trailers if you want to have an awning that you can see out of when your window is closed.
UPDATE: If you are looking to reduce heat in your RV / Trailer, I have come up with DIY magnetic sun screens that are much quicker to make and you don't have to take them down when it storms. (The awnings can bang and be annoying when it's really windy) Click here for the new tutorial.
Ok, here's how to make the awnings - they attach to the camper using Command Hooks. They are adjustable to multiple positions. At night I actually fold the bracket arms completely up and let the awning drop almost flat to the camper. This allows about 3 inches of air gap, and total privacy. It's great I, we can leave our windows open at night and get a breeze without losing privacy
PART ONE - Awning Frame From PVC
Step 1 - BUILD BASIC FRAME
I decided how large to make the awning, and built a simple frame from CPVC. Basically, it's a square from 1/2" CPVC, with a 'T' fitting on each sidebar about 1" from the corner and a brace in the center. It takes 4 "T" fittings and 4 90 degree corners. You will also need a couple short pieces of PVC that are big enough for the frame CPVC to slide into to make the adjustable braces.
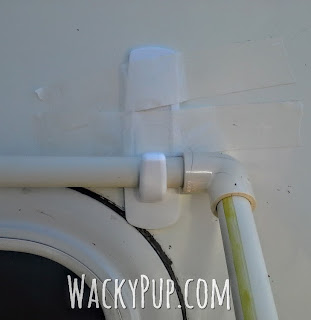
This particular CPVC fits into the Command Hooks perfectly!
I highly recommend investing the $9 in a cutter if you're going to anything with pvc. I was using my compound miter, but this is much easier, and very accurate.
DO NOT GLUE THE PVC TOGETHER YET!
Make sure that it extends past the window enough to allow you to mount 4 Large Command Hooks (5 lb capacity) - one on each corner.
(don't use tape to hold them permanently LOL this was when I was figuring out where to put them.)
Step 2 - MAKE IT ADJUSTABLE
In order for the supports to be adjustable, they have to be able to move on the frame. I thought about a couple different ways to accomplish this:
But the best solution was this:
I used a heat gun to soften the end and flatten it. It took less than 30 seconds to get soft enough to flatten. You can use a small vise as I did, or even a good pair of pliers will do it.
Drill a hole through each flattened end and use a bolt/washer/nut to secure them.
Step 3 - MAKE THE SUPPORT LEG
Use a PVC pipe that the frame pipe will fit into. The outer pipe has one hole, and the inner pipe (attached to the awning) has multiple holes. Use a d-pin or something fancier to set the height. Drill one hole about an inch down from the top of the larger pipe. On the smaller diameter pipe, drill evenly spaced holes and make sure they are at the same points on both left and right pipes.
PART TWO - THE AWNING COVER
Here is what the finished awning cover will look like - it is easier to understand the process if you see what the end goal is :)
I had a beach umbrella that had died on our last trip to a really windy beach.
The fabric is perfect because it is lightweight, sun resistant, waterproof, and blocks UV.
I removed the top section, then separated the main fabric into two parts.
The easiest way I found to do it was to use my favorite little rotary cutter to cut the seam off since it was so small and I wouldn't lose much fabric this way.
If you want to use a seam ripper, I highly recommend the white Clover Seam Ripper, it has lasted the longest and does the best job of any I've ever used.
By the way if you need a reliable, sewing machine that makes great buttonholes, I recommend this one - I love it!
By the way if you need a reliable, sewing machine that makes great buttonholes, I recommend this one - I love it!
Step 1 - CUT THE MAIN FABRIC
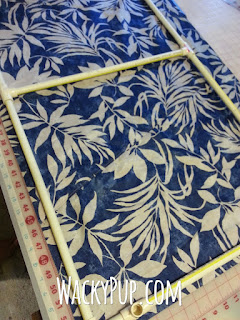
Lay the frame on the fabric. I took the seams apart and flipped it around and sewed it back together so I could have less waste. Depending on your frame/umbrella size, you may have to do that, too. If you're using purchased yardage, then it's not a problem!
Cut the fabric 1/2 to 3/4" larger on three sides and about 3 1/2" larger on the top/back edge. The measurements are not precise, you can most likely make it work with what you have.
Round the corners of the front two edges.
Step 2 - MAKE & ATTACH EDGING
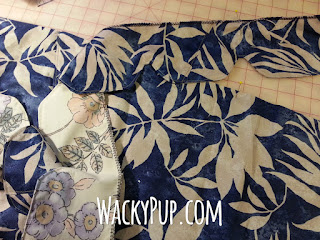
The awning will look best if you add an edging along three sides. This will hide the lining pieces, adds extra sun protection and looks CUTE! Make an edging equivalent to two sides and the bottom. It can be scalloped or plain, I like a simple flattened scallop. Basically, all you do is cut two lengths of edging, sew them together, right sides together, on the lower edge (the edge that will flap in the breeze) and then turn right side out. The open edge will be sewn to the main body of the awning.
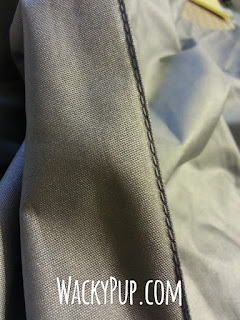
The fabric I used to line the edging and to make the sleeves for the frame is just an old sheet. Pin right sides together and sew the edging to the awning body. I used a 1/4" seam and serged it as well. If you plan to use a larger seam, be sure to cut your fabric a little larger.
Step 3 - MAKE SLEEVES FOR FRAME
Make four sleeves to hold the front and sides of the frame. It makes more sense in the photo below. The sleeves are two pieces of fabric sewn together and turned, The long edge is the raw edge because it will be sewn into the seam with the edging.
Lay the sleeves over the awning in the right places and sew that seam. I forgot to take a picture of this step, but turn the edging so you can see the seam and lay the sleeves over the awning and edging. You will sew the sleeves along the same seam you made to attach the edging. When you turn the scalloped edging down, it will hide these seams.
Then lay the frame down, fold the sleeves over the PVC pipe and mark where it fits. Remove the frame and sew the edges of the sleeves down. I used a zig-zag stitch so that the stress was distributed a bit more evenly than just a straight stitch. Hopefully, this will make it more durable.
Step 4 - FINISH THE BACK/TOP EDGE
This is what it should look like at this point. Now we have to finish the top/back edge so that there are two sleeves for the frame and two holes to allow the Command Hooks to slip through.
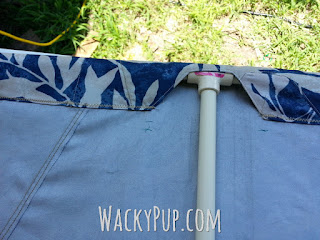
Mark the frame where the command hooks will fit. Put a piece of fabric there and mark as shown in the photo, about 1" wide x 3" long.
Sew on this line, cut in between the stitching as shown, and turn right side out. This makes a reinforcement for the area where the command hooks go.
Fold the edges under and sew it down.
This is what it looks like when it is finished:
and this is how it fits over the Command Hook
To make the sleeves for the frame on the top - use another piece of fabric as a lining as shown. Mark from the center about 2" on either side, up to about 2" high in the middle. The photo makes more sense.
Sew on this line.
Trim the seam, and turn right side out.
Test fit the frame into the sleeves again (you have to take the frame apart to fit it into the sleeves. Mark the sleeve placement, remove the frame and sew the sleeves down with a zig-zag stitch.
This is what it looks like finished:
PART THREE - PUT IT TOGETHER!
After you have gotten it put together so that you like the way it fits, you can glue the PVC together. I want mine to break down into separate pieces so that I can store it more easily, but if you want it permanently assembled, you can glue all the joints.
This is how my awning breaks down for storage - these are the only pieces glued together.
To assemble - first put the top and bottom pieces in their sleeves.
Next, put the middle piece in, then the side pieces. Lastly, insert the support legs into the "T" fittings.
If you are in a windy area, you may want to add a clip of some sort to keep the top of the awning from blowing out.
This is how I did it, and it seems to work well.
Hang the top of the awning on the two top clips and slip the bottom supports over the bottom clips.
When you're ready to hit the road, remove the awning and slide off the command hooks!.
Here is the awning at its highest
And at its lowest.
At night I actually fold the bracket arms completely up and let the awning drop almost flat to the camper. This allows about 3 inches of air gap, and totally block the view from outside. It's a great improvement we can leave our windows open at night and get a breeze without losing our privacy!!
It has really helped to keep the sun out of the camper!
Let me know if you have any questions and please share photos if you make an awning!


 .
.










Thank You I cant wait to make this for my Motor Coach! XOXOX
ReplyDeletePlease send me a picture if you do! That would be so neat I would love to see it!
ReplyDeleteLiz
Thank you for your detailed explanation. It was just what I was looking for.
ReplyDeleteYou're welcome! Hope your awnings turn out great. They really do look cute when they're all open :)
ReplyDeleteI have come up with an easier way to keep the heat out - magnetic solar screens. They block 90% of the sun's heat. They've been really great this hot summer. I wrote a tutorial here - https://wackypup.blogspot.com/2019/08/cut-heat-with-diy-magnetic-solar.html
Thanks for visiting!
Liz
How did the command hooks hold up over time? Did you just put them up with the adhesive that came with them or use added glue?
ReplyDeleteI have finally figured out how to directly answer your question. The command hooks held up until this year, so they worked for about 5 years. I just used the adhesive that came with them, but after years in the sun, the adhesive did not release as designed, so will have to be scraped off. I may just glue the brackets on with E6000. Did you ever see the original answer that I posted to you?
DeleteThey have been on in the Texas sun for almost three years now and are holding up fine. Command does make an exterior Adhesive strip. I think I just used the regular one that came with it. You could always glue them up with E6000. Let me know how yours turn out if you make them.
ReplyDeleteLiz
Has your sister been happy with the retractable shades from Amazon? Thank you! Kristy
ReplyDeleteI tried to answer this but I'm not sure you saw the answer. My sister did like the awnings but they didn't hold up as long as the ones I made have. They are still going strong many years later. Even the one I made from just heavy fabric and not an umbrella. Actually it held up longer than the umbrella fabric did.
DeleteKristy, Yes she loves them.
ReplyDeleteHello! I'm at work surfing around your blog from my new iphone!
ReplyDeleteJust wanted to say I love reading your blog and look forward to all your posts!
Carry on the outstanding work!
OMG! AMAZING! I AM DOING THIS TODAY! Ok I am at least going to start it today! So glad I found your site! I'm in Boerne Texas, I have one window that never gets a break! Thank you so much!
ReplyDeleteI tried to answer your comment last year, but it wasn't working. I think I fixed it now. Thanks so much for taking the time to comment! I appreciate it! Did you make the awnings? did they work out for you? Do you have any improvements/suggestions?
DeleteJentfur - I'm glad my idea helps! They really do work well. I actually like them better than the screens, they are a lot cuter! Please let me know how yours turn out! I would love to post a pic here and give you credit!
ReplyDelete- Liz (Wacky Pup)
I made 2 awnings similar to yours. I give you all the credit. I love them. And they withstand pretty high winds.
ReplyDeleteYou are awesome.
If I can figure out how to do it, I will post pics
I see your reply. I will take the pics in a few days and try to post.
DeleteIf you can't find outdoor canvas just paint a dampened drop cloth with a 50/50 mixture of regular house paint and fabric softener. It dries to a weather resistant plastic-like coating that doesn't crack. Use this same mixture to rejuvenate old cushions and umbrellas. You get custom color options and more life out of your outdoor fabrics.
ReplyDeleteThank you for such a great idea! I am glad to add it to this article, I need to make more awnings please have just about worn out. Thanks for reading and commenting!
ReplyDelete