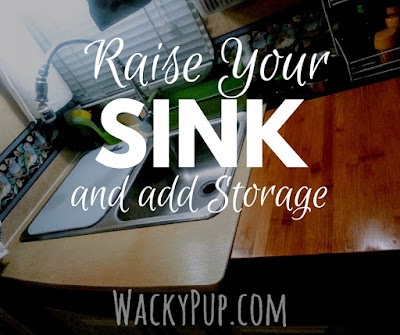
THIS IS MY FAVORITE MOD EVER! I can't tell you how much I love this!! I go into the camper and just stand in front of my 'new' sink and smile!! It's so nice and much more comfortable! Plus it looks snazzy! and has new storage . . . .
I love my camper!!! But one thing that has always been irritating is
that the kitchen counter is VERY low, just a little over 33 inches high - 3" lower than a standard counter! I'm moderately tall, 5'9" and my husband is 6'4" so it's very uncomfortable, actually painful! to wash dishes, or even prepare meals. The only solution I came up with was to bring a stool to sit on -- one more thing to fit into this tiny camper :)
that the kitchen counter is VERY low, just a little over 33 inches high - 3" lower than a standard counter! I'm moderately tall, 5'9" and my husband is 6'4" so it's very uncomfortable, actually painful! to wash dishes, or even prepare meals. The only solution I came up with was to bring a stool to sit on -- one more thing to fit into this tiny camper :)
Over the years I've owned the camper, I had thought about how to raise the counter but didn't want to rip out the whole cabinet. I thought I'd have to raise the stove also, and I didn't want to mess with gas lines. A couple days ago, I realized I could JUST RAISE THE SINK!
As long as you're working on plumbing, you might want to pick up some water alarms. I wish I'd had them in my new Grand Design trailer, it has had 2 plumbing leaks and a wall that leaked. These alarms come highly recommended by RVers. They come in a pack of 3 for under $20. They can save you a lot more than that!
 They come in a pack of 3 for under $20. They can save you a lot more than that!
Very simple, and pretty quick! Ended up with two storage drawers and lots more room in the cabinet under the sink, too! Win-win-win!! So here's how I did it!
Using this technique, I added almost 4" to the counter height and made it a much more comfortable 37" (standard height is 36") I gained two storage drawers, and lots more open space under the sink!
To the right of the sink is a large bamboo cutting board that acts as both a counter and a cover for the stove burners.
Ok, let's get started - First, I disconnected the supply lines and the drain lines.. Next, I removed the sink - it was held down with a few clips and some plumber's putty. I looked under the sink and found the clips, they had a screw type pin that unscrew and the clips will come out. Then I ran a knife (I prefer a snap razor knife) all around the edges of the sink. I pried the sink loose slowly and carefully to avoid bending or damaging it.
Now that I had the area empty, I planned my new counter. My camper has a gentle curve to the front, which I copied onto my new raised counter. I built a simple frame around the old sink hole to support my new counter. I left space at the front for the drawers, and at the back for storage bins/cups.
I plan to add drawers to the front of my counter. Even a small drawer makes a big difference. I managed to fit two drawers, one is about 4"x15" and one is about 3"x 10". I made them uneven so that I could have one large enough to store the cooking utensils. Since I am going to paint parts of it in contrasting colors, I painted it before adding the final counter top.
NOTE: If I had wanted to reuse the clips to hold my sink down, I would have had to leave enough room for them between the sink edge and the base of the riser. I wanted the risers as close to the sink as possible, so the drawers could be larger, so I did not use the clips on my sink.
Next, cut the counter. I used a nice 3/4" plywood. I wouldn't use anything thinner than 3/4" since I want it to be able to support a sink full of water. I made sure measure the actual sink and cut the hole to fit instead of just copying the existing hole. Sometimes, as in my case, the hole in the camper was actually cut too large! To copy the front edge of the counter, I laid the wood directly on the it to make sure I got the shape correct.
I cut it out using this - my favorite jig saw! I love this thing! and it was only $30 - they have a newer version now, it's probably even better!
Drill the hole(s) for the faucet. I have a single hole faucet. I also cut holes along the back to put cups in to hold the sponges and utensils. My original plan was to cut larger holes and put plastic bins in them, but I wasn't able to find suitable bins.
I test fit it together to make sure everything was where I need it to be. I put a couple coats of good poly on both sides of the new countertop.
PLUMBING
Since I am raising the height of the sink, I will have to add a piece to the drain. The existing faucet lines were long enough and didn't need to be replaced.
I would definitely need a piece that looks like this and is less than $5 from Amazon and probably less if I lived close to a home improvement store.
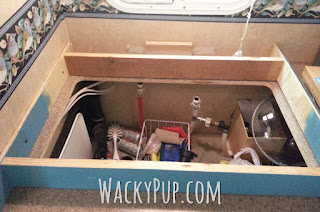
This is how it fits into the drain. That is all ADDED SPACE! You can't tell it from the photos, but originally, the sink bowls protruded into the space under here and really limited the storage. It's amazing how much more space there is in the cabinet now!
Test fit the sink with the plumbing and make sure everything fits right, although if I screwed up, I can fix it all after it's put together, it's just a lot easier to do it beforehand.
When I had it where I want it, screwed it securely by putting screws up through the old countertop from under the cabinet.
My camper is 10 years old, and I found that the existing counter had really sagged over the years. I didn't realize it until I took the sink out and built the new frame. Screwing the new frame on really helped pull the old countertop back into shape.
I wanted to make sure that the faucet was well-supported, but needed to have room for the hoses to go down the holes in the old countertop, so I just glued a piece of wood to the back wall for support. Once the counter is sitting on it, the pressure and glue will keep it in place. I also drove a screw into it from undereath.
Looks good! Ready to put the counter on! I recommend mounting the faucet before attaching the countertop, it's a lot easier!
I could have used pocket screws, or nails from the base to the underside of the new countertop, but I attached it with good wood glue and clamped it overnight before continuing.
After the new countertop is attached, it's time to put silicone on the edges that contact the wall. To get a really nice bead, I put masking tape on either side of the area to be caulked. It's worth the time to do this, silicone is a pain to work with!
I recommend silicone that has a mildew inhibitor in it. After I smeared the silicone all over the place, I just pulled up the tape slowly and carefully and had a nice clean bead. I did it pretty much as soon as it's finished. It's a good idea to have some newspapers or paper towels to lay the sticky, caulking covered tape on so it doesn't get all over everything.
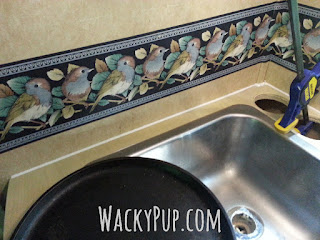
I cleaned all the old plumber's putty or mastic from the edges of the sink.
There! All pretty and clean! If I had used plumber's putty and clips, the sink would be more easily removable. I just put a good layer of silicone caulking around my sink and plopped it in there. Ok, I was more careful than that, but it's not hard :)
I put some clamps on the back, and my heavy cast iron pans on the front to hold it down.
Here you can see how nice the caulking looks after removing the masking tape. I should have taken a photo of what a mess it was all over the tape!
Looks Great!
What an improvement! Come stand here - see your back doesn't instantly hurt!! yay!
We thought it would be a nice touch to dress it up by adding a piece of metal to the side by the stove. Looks snazzy, eh? Plus, it protects the wood from the heat of the burner. We don't use the gas burners much, usually we use a two-burner hot plate or our amazing new electric pressure cooker.
Next, I built drawers that fit into the hole under the front of the sink. If you want more detailed information on that, let me know and I'll write it up :)
Basically, they are a simple, lop-sided box with a thin bottom glued/nailed. I didn't make them complicated drawers because I wanted to maximize the amount of storage I could fit into the area. I attached a small piece of wood under the front of the counter to create a lip to keep the drawers from sliding out while we travel.
I used short screws to screw a loop made from leather scraps to the front to act as drawer pulls. To the right, covering the stove, is a nice, large, bamboo cutting board that I got from Ikea. I attached it to a frame that matches the sink height. It can be turned over to double as a serving tray.
I love my new sink! and did I mention that it has hidden storage? :o)
No more cluttery jar of cooking utensils next to the sink and NO MORE BACKACHES!!
Let me know if you use any of my ideas - thanks for reading!


Nice Job!! Very creative!
ReplyDeleteThank you! Wish I had figured this out 10 years ago LOL I think I will do it to every camper I ever own. Thanks for letting me know you like it
DeleteGENIUS!!
ReplyDeleteWell I wish... But it was pretty clever I have to admit. Thanks for writing! I do appreciate knowing someone is actually reading my blog.
DeleteThis looks like a great solution for my sink related back pain too! Thanks, great direction too which helps us a lot.
ReplyDeleteYou're welcome. I just used our camper for the first time since I raised the sink and it's wonderful! No back ache! If you raise your sink, please send pictures I would love to see what you do!
DeleteI wanted to thank you for this great read!! I definitely enjoying every little bit of it I have you bookmarked to check out new stuff you post. here
ReplyDelete