smile

NEW! I am working to change all Amazon links to go to Smile.Amazon
Any link from this site will automatically raise money for your favorite charity! And it doesn't cost you a thing!

Low-Cost Rabbitry - Ways to be Self Sufficient on a Budget


Well, I know that this blog is supposed to be about modding a travel trailer and traveling (note the use of the word travel) Unfortunately, we have been stuck in one place for two years because of the insanity. So, anyway, we've been living on my sister's property and I decided to get some rabbits. You know, for when they manage to burn down ALL the food processing plants. 

We meant to get 3 rabbits, and ended up buying out a guy that had 10 rabbits (2 preggers) and a bunch of haphazard cages.  A total of 26 rabbits at one point.

Having rabbits is wonderful! They are true stress relievers. There are many days I come out to feed them and end up spending practically the whole day out here. 

I have come up with ways to make cages and equipment using recycled and/or free items that you may be interested in. Maybe you might like rabbits :)

If you have any ideas you think I can use - please let me know!

CAGES

This is a 9 lb rabbit in a medium kennel

First, if you don't have a rabbit hutch or cage, look for one of those wire dog kennels. We had a few and I thought they would make good emergency cages. Turns out they're great and I plan to continue to use them. They have a lot of advantages

This is a 13 lb rabbit in a large kennel
  1.  They are inexpensive. I have paid as little as $5 for a very large cage at a yard sale.
  2. They are tall enough to allow them to stretch their backs and have a shelf
  3. They are sturdy, the rabbits cannot chew through the bars.
  4. They are lightweight and moveable
  5. It's cheaper than building a hutch, if you get them second-hand.

They do have one drawback - The bottoms must be covered with wire fencing or hardware cloth 

Well, pretty much that's the only drawback and it's a lot cheaper than building an entire hutch. If you are going to have babies, you need to cover the first 3"-6" of the sides so they can't fall out.

We also got 2 huge cages made from Closet Maid wire closet shelving. They are hung from the rafters using the wire that is used for the top of chain link fencing. They are 72" x 32" and originally had wire closet shelf as flooring. This was uncomfortable for the rabbits so I covered it with hardware cloth. This was uncomfortable for ME because their poop got caught in it and it made it a huge chore to keep it clean.

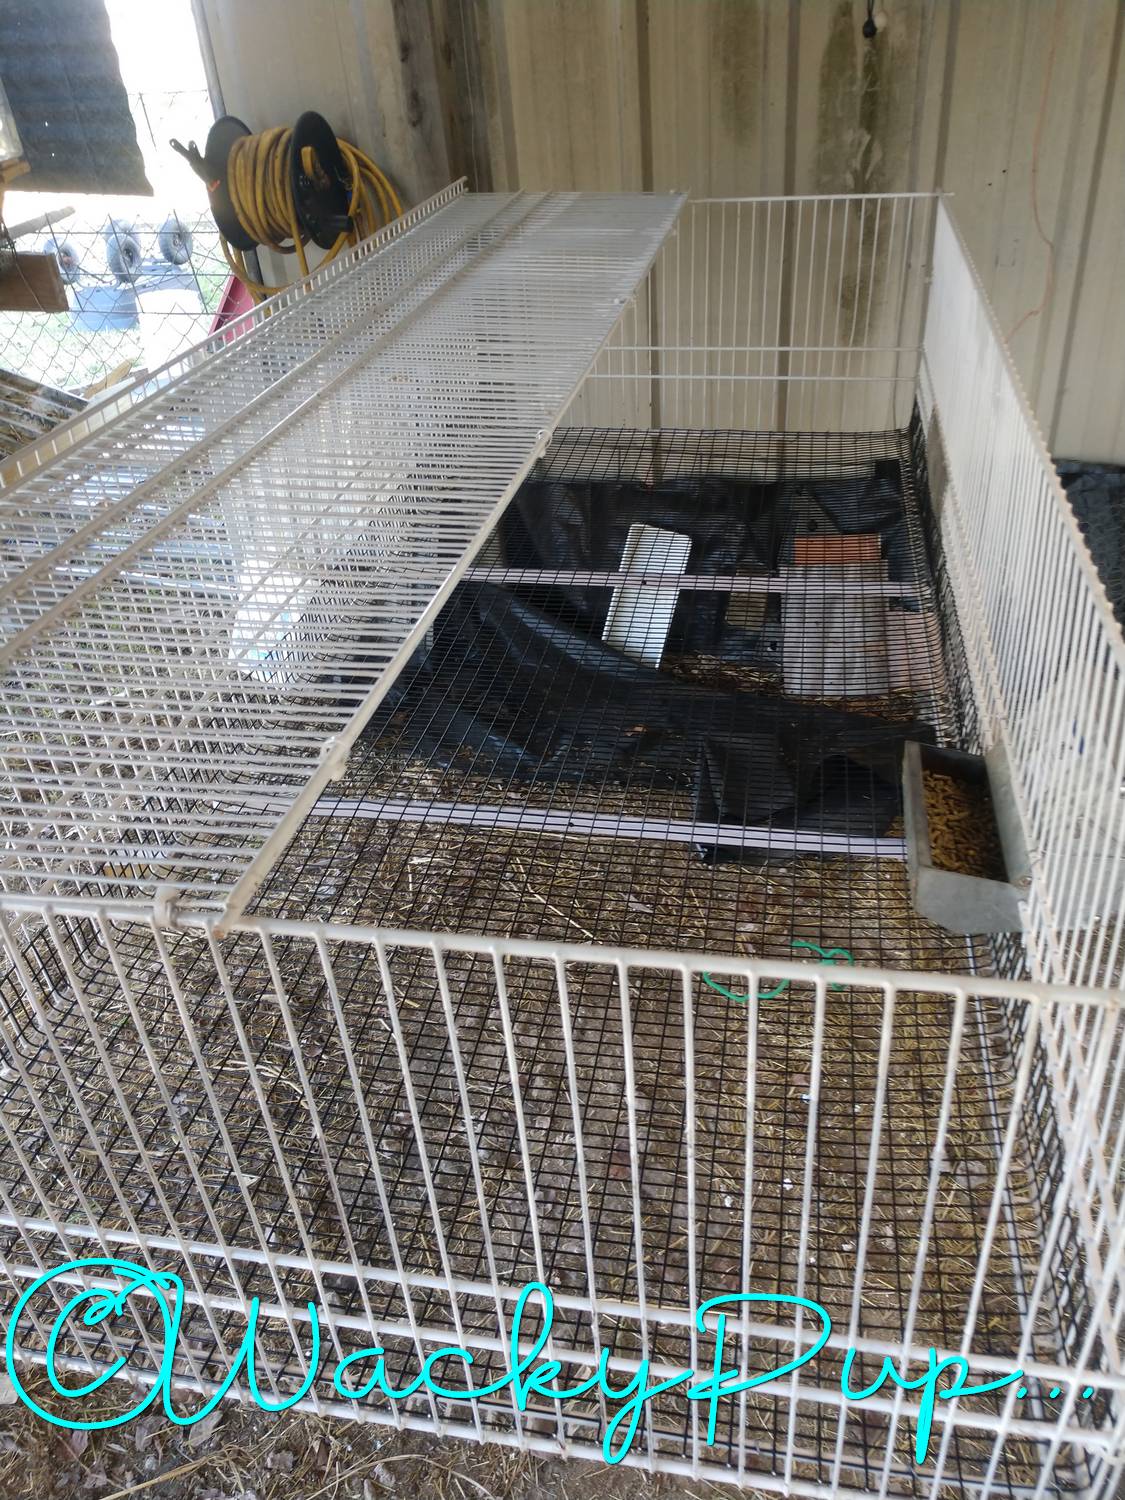
I removed the bottom section and replaced it with some really nice wire fencing with 1/2" x 1" spacing. It is sturdy enough without bracing, but I put braces every 24" anyway. The braces are remnants of an 'ez-up' shelter that got destroyed in the wind. This is why I save everything LOL. The metal is sturdy and the rounded, enameled finish means it's easy to clean.

The longer cage can be divided into multiple cages by affixing scrap wood dividers. Make sure to cover the edges with metal so the rabbits won't chew them. 

Speaking of round metal - instead of wooden supports under the cages that are on a stand we used metal pipes. They are indestructible and easy to clean. We could actually suspend the cages as we did the long ones, but at this point they are just mounted to the columns. If we ever have a problem with rats or ants, we will change it to a suspended set-up.

Ceramic Floor Tiles:


I make sure that each kennel has a nice wooden shelf that gives them somewhere to get off the wire. You'd be surprised how tiny the babies are that can leap up to the shelf. I thought it might give mom a break, but not really! I keep a ceramic floor tile in most cages (some rabbits don't like them) I use them to put their treats on so they don't fall through the wire. They sometimes sleep on them - or just use them for a pillow LOL. 

Housing/Shelter/Nest Boxes

 
The square cat litter boxes are very handy. Not only do they make nest boxes and play houses for kits, some of the adult rabbits like them as a shelter. Actually the only one I have that likes it is my buck, and he loves his house and keeps it very clean!

Feeding:

I have some J feeders that are nice. However I don't want to cut holes in the dog crates so they are mounted inside the cage. It was a pain to fill them until I came up with this solution - 


I cut down a juice bottle and use it to funnel the pellets into the feeder. Some rabbits will leave it alone, but most will play with it if you leave it in there.

 
Also, baby rabbits tend to WASTE a LOT of food - even though the chickens will clean it up, I hate the waste. If you suspend a small plastic container under the cage, it will catch a lot. If you can't do that, you can make a metal tray from flashing with wooden ends as shown here. Drill a couple holes in it and attach it to the flooring so they don't throw it around.

Hay Racks:

Any large plastic container can be cut in half to create a hay rack. These minimize hay falling out and there is little wasted hay. Punch 3-6 holes in the side and attach it with zip ties or wire. For some reason, my rabbits never chew the zip ties on the hay racks. I use detergent containers. If you worried about 'food safe' plastics (I personally don't think any plastic is 'food safe') You could use large cooking oil containers, or even milk jugs. I started out with milk jugs, but they weren't very large. I don't worry about the plastic because the hay is dry and doesn't contact it for long. I don't think plastic chemicals can leach out of the containers into the hay, but I could be wrong. As in everything, use your own judgement.


Protecting Metal Cage from Salt Licks


You can make "designer" salt/mineral licks by buying a large horse/deer sized salt lick and breaking it up with a hammer, axe or sledge. Drill a hole through each piece and you have 'designer' salt blocks not one of those silly wheels. I paid $6.99 for a 50 pound salt/mineral block. 

Protect the metal cage wire from the salt by cutting a small piece from a plastic jug (milk bottle?) and punch 2 holes in it. Put it between the salt and the wire. If you use the curved area, the moisture will not run down the cage side.

Feed Scoops & Traditional Can Feeders:

Small scoops from ammonia bottles, larger can be made from bleach bottle. The one on the right was to feed through the bars into the feeder.


Feeders made from coffee cans have been around for 100 years. I put some rivets in to make sure it didn't come apart. I also cut out the bottom and put screening to get rid of the dust. I added a slanted insert that pushes the feed to the front part. Basically it's a J feeder.

Poop Patrol

Now that you've gotten all the food into them, you have to deal with it coming back out the other end. I'm not the one who came up with this, but I think my version works quite well. I have them hung under the cages using the same fencing wire as I hung the cages with. 


It doesn't take much support, the fronts & backs are held up by 1x2's.  I used old metal roofing we had saved. I cut a piece of wood that fits into the guttering and scrape it out every day or two. It has cut down the cleaning time by 90%. 


It can be done to cages on stands just as well.

Miscellaneous


Get creative with your cages. I have a 13 lb rabbit and she needs a lot of room to stretch her back. When I had her in a cage that was only 18" tall, I added a second story. 


Save all your feed bags. They look tacky but are very useful. I use them to protect the rabbits from the very strong thunderstorms we have here. Even though they are under a roof, the wind blows so strongly in Texas that sometimes I have to cover the sides closest to the exterior. In the winter they protect them from the cold. It has been getting into the 20's here for weeks at a time, unusual for this part of the country. 


If you use feed bags, metal office clips are great for attaching them!

Thanks for reading! Please send in any of your ideas!!

Live Creatively!

Liz

No comments:

Post a Comment

Thank you so much for taking the time to share a comment. If you have a question please use the CONTACT FORM at the top right of the blog to contact me. I can't answer your questions through the comments section. I don't know how to fix this so just use the contact form and I can answer any question you may have. Thanks!

HOW TO CONTACT ME

Please use the contact form at the top right of the article to ask me any questions or if you want a reply to your comment. If I reply to your comment on the website, you may not know it or receive any email. Thanks for taking the time to comment, I really appreciate hearing from you!

Join Passport America! Save Money!


PLEASE USE REFERRAL MEMBER GS-671013

Dehumidifier

Dehumidifier
I just bought this - it's 2x as effective, super quiet, lightweight. It's doing a great job! It has made a noticeable difference in the comfort level of our rv.